Android - MoPub
android mediation
android mediation
Please make sure you’ve added following files in your project:
Note:
Besides ad integration, to make the Ads work more smoothly and release resource appropriately, we recommend that you should implement Activity method in the Activity Lifacycle. (Please refer to [MoPub API)])
For Vpon SDK and Vpon MoPub Custom Event, please download here.
Please follow the instruction below to integrate Vpon Native Ad via MoPub Mediation.
This instruction is compatible with Vpon MoPub Custom Event v1.3.0 and above version.
Please use VponViewBinder and VponNativeAdRenderer to set up Native Ad Layout.
...
moPubNative = new MoPubNative(this, MY_NATIVE_UNIT_ID, moPubNativeNetworkListener);
VponViewBinder vponViewBinder = new VponViewBinder.Builder(R.layout.mopub_native_layout)
        .mainImageId(R.id.native_main_image)
        .iconImageId(R.id.native_icon_image)
        .titleId(R.id.native_title)
        .textId(R.id.native_text)
        .callToActionId(R.id.native_cta)
        .privacyInformationIconImageId(R.id.native_privacy_information_icon_image)
        .build();

VponNativeAdRenderer vponNativeAdRenderer = new VponNativeAdRenderer(vponViewBinder);
moPubNative.registerAdRenderer(vponNativeAdRenderer);
moPubNative.makeRequest();
...
Note: If you are using
Vpon MoPub Custom Event v1.1.0 or below version, please useViewBinderandMoPubStaticNativeAdRendererto set up Native Ad Layout.
Replace ImageView with VponMediaView to display more diverse creatives.
<?xml version="1.0" encoding="utf-8"?>
<RelativeLayout xmlns:android="http://schemas.android.com/apk/res/android"
    xmlns:tools="http://schemas.android.com/tools"
    android:id="@+id/native_outer_view"
    android:layout_width="match_parent"
    android:layout_height="wrap_content"
    android:background="@android:color/white"
    android:textDirection="locale">
...

    <com.vpon.ads.VponMediaView
        android:id="@+id/native_main_image"
        android:layout_width="match_parent"
        android:layout_height="200dp"
        android:layout_alignParentLeft="true"
        android:layout_alignParentStart="true"
        android:layout_below="@+id/native_text"
        android:layout_marginLeft="10dp"
        android:layout_marginRight="10dp"
        android:layout_marginTop="10dp"
        android:background="@null"
        android:contentDescription="native_main_image"
        android:scaleType="fitCenter" />
...
To setup MoPub, you need to complete the following steps:
Click “Inventory” tab and click “Add a New App”. Register your app here.

In the inventory that you just created, click “Add an Ad Unit” to create a native ad.

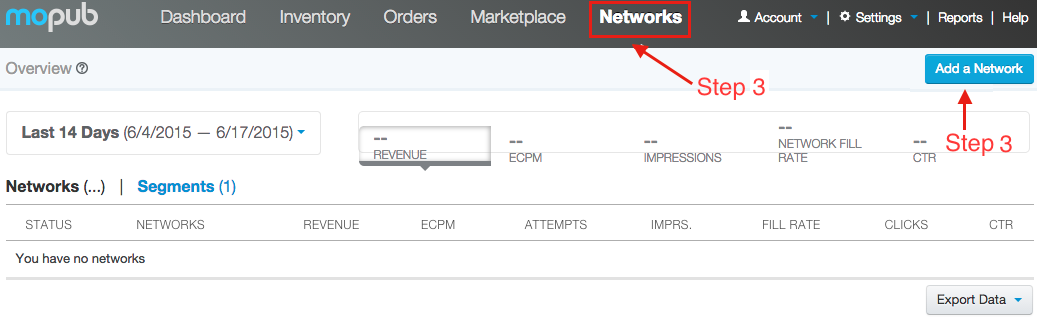
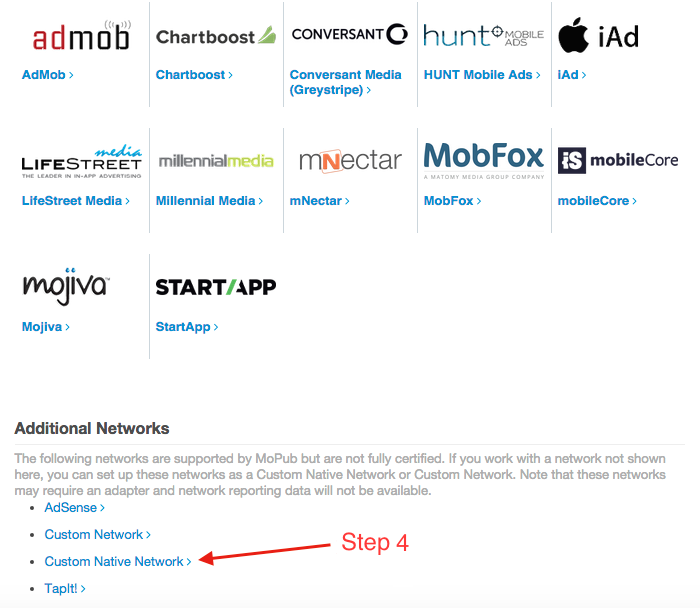
Click “Networks” tab and click “add a Network”.
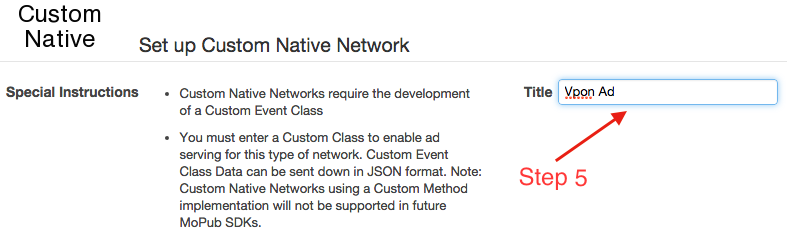
Fill in your package name + class name, you can see the sample at the reference page.
Fill in License Key which you apply from our Vpon website, and the key is adUnitID

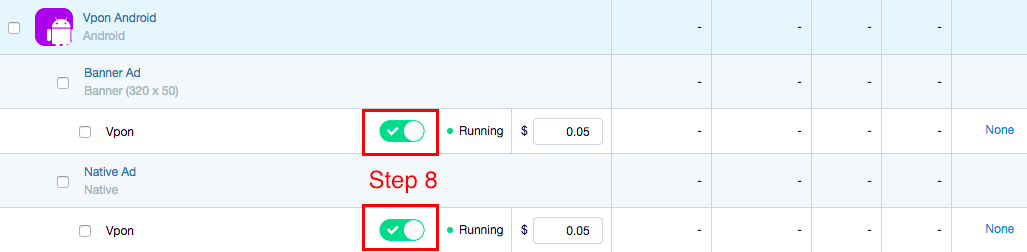
After filling in the data above, click “Segments” tab and choose “Global Segment”, you will see your inventory, ads, and Vpon ad network. Please turn Vpon Network “Enabled” on, and check the the stauts of the network is “Running”.