Overview
Vpon Mobile Web SDK provides Original Banner which can be placed your mobile website to maximize your monetization.
Note: Original Banners are only available on
mobile sites, you won’t see any ads if you open your website with personal computers.
Ad Formats
Vpon Mobile Web SDK supports the following original banner ad formats:
| Name | Size(WxH) |
|---|---|
| Banner | 320x50 |
| Medium Rectangle | 300x250 |
Setups
Basic Setup
You should put following code snippet in the <body> section of the page that you want to show ads.
<body>
...
  <vpon vpon_ad_test="1"
        vpon_ad_licensy_key="Your First License Key for Banner"
        vpon_ad_format="320x50_mb"
        debug="true"></vpon>
...
  <vpon vpon_ad_test="1"
        vpon_ad_licensy_key="Your Seconde License Key for Banner"
        vpon_ad_format="300x250_mb"
        debug="true"></vpon>
...
  <vpon vpon_ad_test="1"
        vpon_ad_licensy_key="Your Third License Key for Banner"
        vpon_ad_format="320x480_mb"
        debug="true"></vpon>
...
  <script type="text/javascript"  src="https://m.vpon.com/sdk/vpadn-sdk.js"> </script>
</body>
Note:
Vpon Web SDK supports
HTTP&HTTPS. Please usehttps://m.vpon.com/sdk/vpadn-sdk.jsas the source and put it before “</body>” while importing SDK. Browsers will import the suitable one base on the protocol of the page. Besides, you only need to import it once.You only allow to use 3 ads at most in each page and please use different License Key for every ad.
Once you finish editing your page, save and reload it. You can find a test ad in the
tag after initializing the SDK. Please modify the parameter of vpon_ad_test to
"0"to get formal ads before you launch your site officially.
Callback
Use our Callback Function rationally when there is no proper ad fill.
<body>
...
  <vpon vpon_ad_test="1"
        vpon_ad_licensy_key="License Key"
        vpon_ad_format="320x50_mb"
        debug="true"
        ad_request_callback="vponCallBackMethod"></vpon>
...
  <script type="text/javascript"  src="https://m.vpon.com/sdk/vpadn-sdk.js"> </script>
...
  <script>
        function vponCallBackMethod(adStatus) {
          if (adStatus != 0) {
            // No ads, do something here.
          } else {
            // Ad received.
          }
        }
  </script>
...
</body>
Advanced Setup
| Name | Description | Reuqired | Example |
|---|---|---|---|
| vpon_ad_licensy_key | License Key from Vpon | Y | Fill in with your Vpon License Key |
| vpon_ad_format | Format: (1)320x50_mb (2)300x250_mb |
Y | “320x50_mb” |
| vpon_ad_test | Test Ad | N | 1(Yes)/0(No) Default = “1” |
| debug | Debugging information in console | N | true/false Default = “false” |
| openTab | If open a new tab to show ad’s contents | N | true/false Default = “true” |
| is_rotate | Enable Banner auto refresh or not | N | true/false Default = “true” |
| ad_request_callback | Callback Function for no ad fill | N | Please refer to Callback |
Sample Code
<html>
  <head><meta name="viewport" content="width=device-width, initial-scale=1, maximum-scale=1">
  </head>
  <body>
    <h1>The Test Page</h1>

    <div>
      <vpon vpon_ad_test="1"
            vpon_ad_licensy_key="License Key"
            vpon_ad_format="320x50_mb"
            debug="true"></vpon>
    </div>
    </br>
    <div>
      <vpon vpon_ad_test="1"
            vpon_ad_licensy_key="License Key"
            vpon_ad_format="300x250_mb"
            debug="true"></vpon>
    </div>
    <script type="text/javascript" src="https://m.vpon.com/sdk/vpadn-sdk.js"> </script>
  </body>
Note: If you use iframe to embed vpon’s ad, please remember to set the size of iframe properly to fit the ads.
Google Ad Manager Mediation
This document provides an instruction of using Google Ad Manager to display Vpon ads.
Create Ad Unit and Generate Publisher Tag
Please finish below setting in Google Ad Manager:
- Create an ad unit.
- Set up Name, Size, and other items for the ad unit.
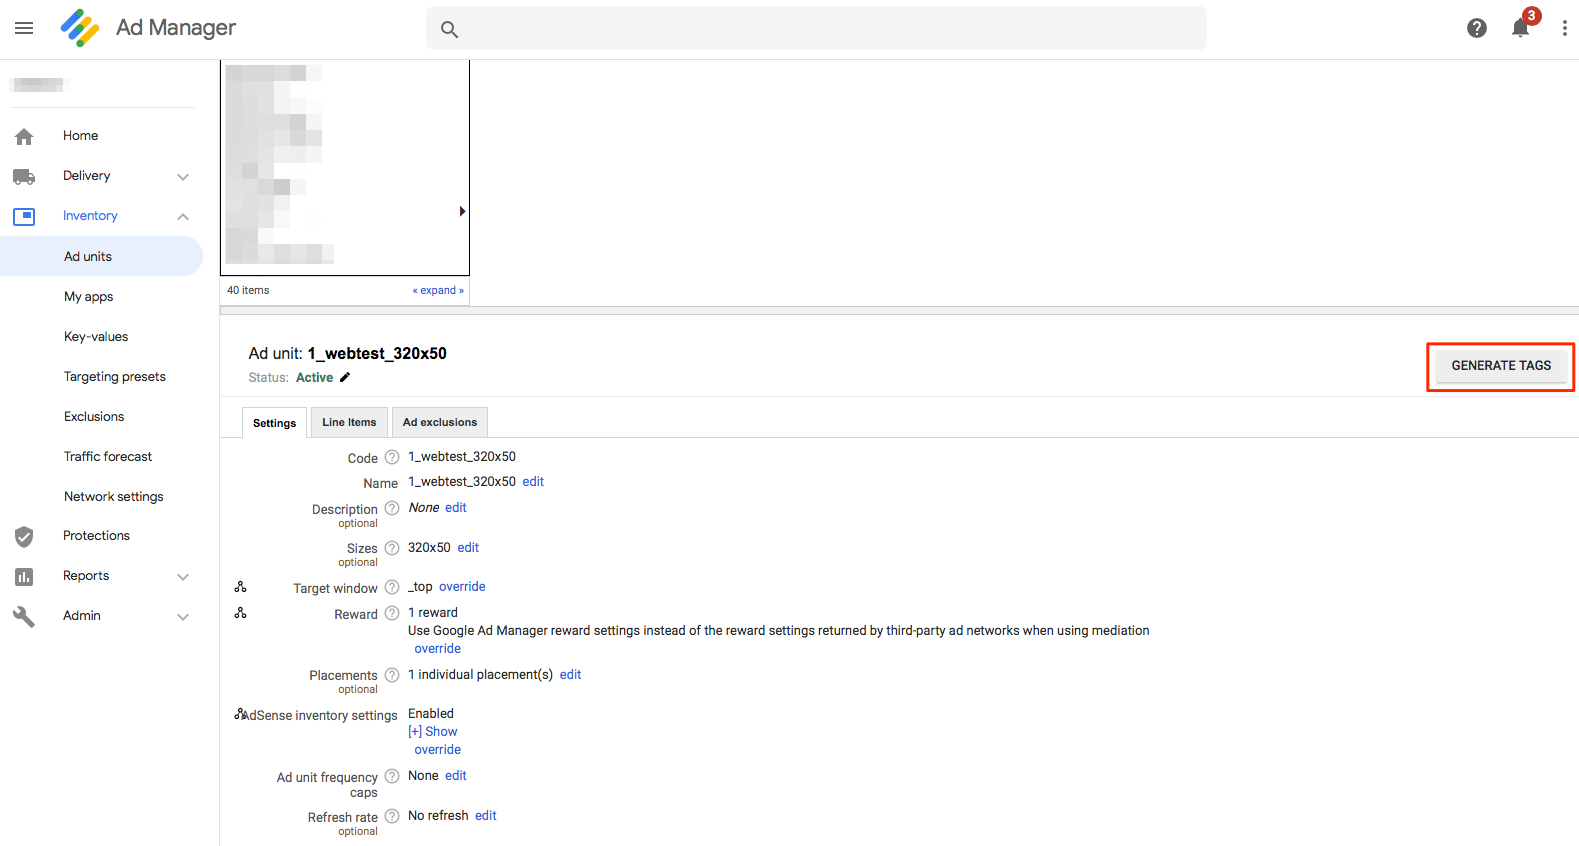
- Generate publisher tag
Select an ad unit, click “GENERATE TAGS” to generate publisher tag.
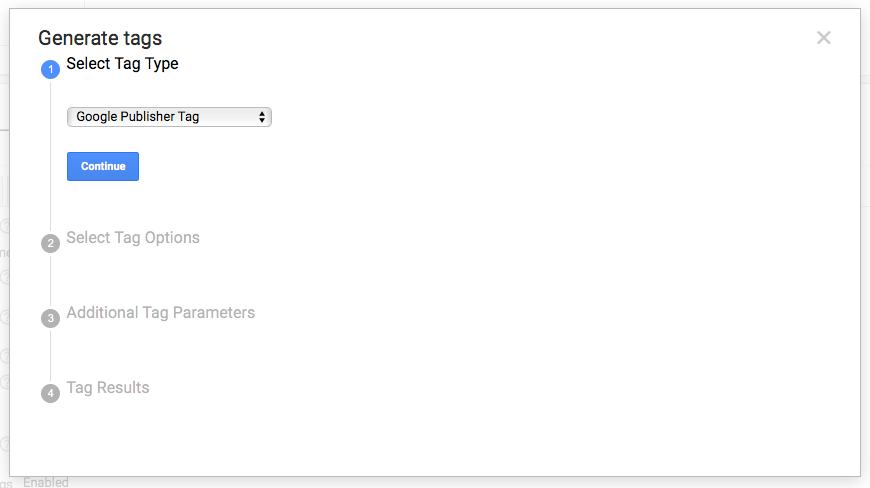
 Choose “Google Publisher Tag” as tag type.
 Click “Enable single request”.
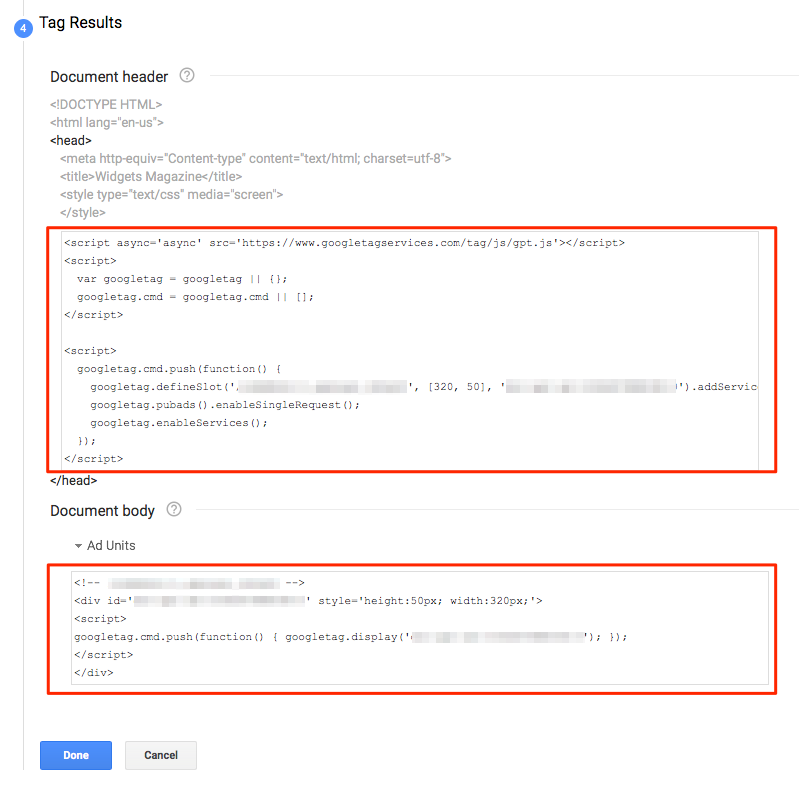
 Please paste the code snippet in Document header to <head> and paste the one in Document body to <body> of your website.
Set Up Orders, Line Items and Creatives
To run a new ad campaign through Google Ad Manager, you have to create a new order first. Then you must create line items, add creatives, and approve the order to serve the ads. For reserved line item types (sponsorship and standard), Google Ad Manager will not reserve inventory until the order is approved.
Create Orders
To create an order before running an inventory forecast:
- Click
Orderstab in Google Ad Manager. - Click
New orderto create a new order. - Fill in order information in appropriate fields.
- Fill in your line item information.
- Click “Check inventory” to ensure the order will have enough available impressions.
- Click
Saveto save your setting. Once you’ve created an order, you must approve it before the line items are eligible to serve.
Note: Order names must be unique within your network.
Create Line Items
- Click “Orders” tab in Google Ad Manager
- Create a new order or choose an existing one in the table.
- Click “New line item” to create a new line item.
- Fill in line item name. Line item name must be unique within your network.
- Choose inventory sizes of the creatives you plan to deliever.
- (Optional) Enter some comments about the line item that might help with targetting the line item.
- Enter the line item type, dates, quantity and cost.
- Under Adjust delivery, configure your delivery settings (optional). See Optional delivery settings below for more information.
- Select the inventory you want to target. You can target at ad units, placements, or both of them.

You can add additional targeting criteria to target a specific audience (optional). If you don’t target the line item to any ad units or placements, then the line item will be set to serve as run-of-network. This means the line item can serve to any ad unit on your website.
After you finish your line item setting, click Save to save it.
Add Creatives
- Choose the line item which you’d like to add creatives. You can also create a new one if needed.
- Click “ADD CREATIVES” to add new creative. All creatives and ad unit dimensions associated with your line item will be listed on the left-hand column. You can upload creatives to any unit size in this list.
- You can either drag and drop several creatives into the line item or just add one at a time.
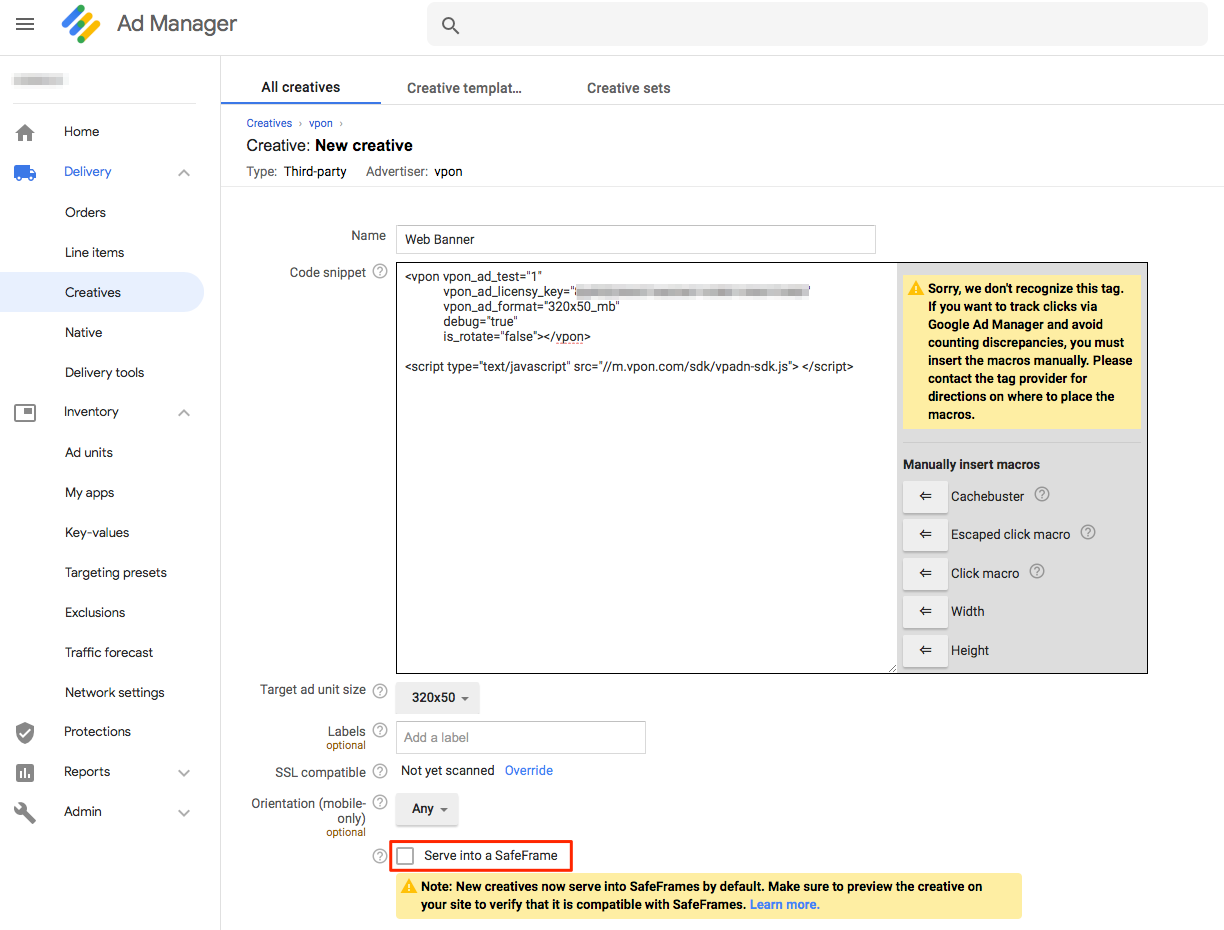
Creative Setting
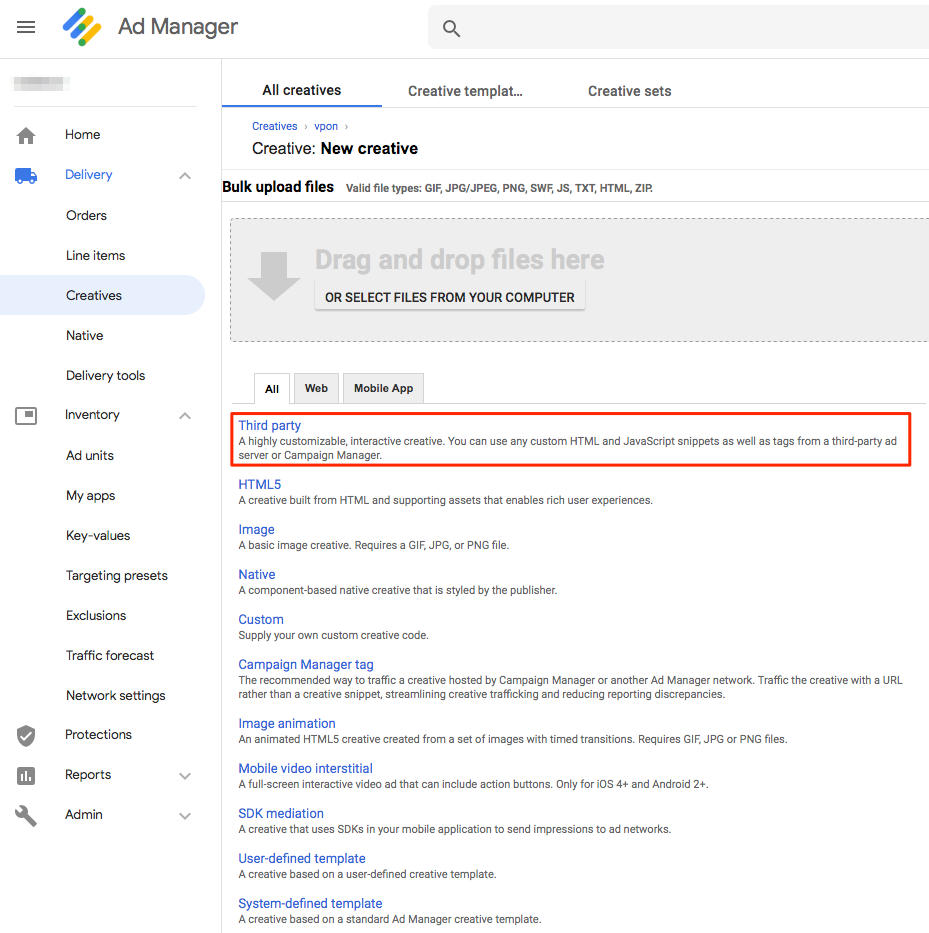
Choose Third party in All tab:
Input the snippet of code:
<vpon vpon_ad_test="0"
       vpon_ad_licensy_key="License Key"
       vpon_ad_format="320x50_mb"
       debug="true"></vpon>
      <script type="text/javascript"  src="https://m.vpon.com/sdk/vpadn-sdk.js"> </script>
Note: vpon_ad_test=”1” for test ads,vpon_ad_test=”0” for normal ads.
Please refer to the screenshot below to finish your setting. Note that “Serve into a SafeFrame” is not support.
FAQ
Still can’t see any ads
Please check the following items:
- Please open the page with a mobile browser instead of a personal computer.
- Clean the cache, delete cookies and reload the page.
Still can’t solve it
Turn on the debug mode and send all of “Vpadn-“ messages to Vpon FAE